INTRODUCTION TO BATHROOM FLOOR UPDATES
✨ Transforming your bathroom on a budget is easier than you think!
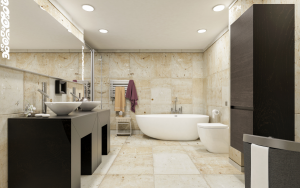
Your bathroom floor plays a big role in the overall look and feel of the space. Updating it doesn’t have to drain your wallet—there are cost-effective methods that allow you to achieve stunning results without breaking the bank. Whether you’re looking for quick DIY solutions or budget-friendly professional options, this guide is packed with ideas to inspire you and keep your project affordable.
COMPREHENSIVE SERVICE DESCRIPTION
Updating your bathroom floor affordably involves creative techniques and innovative materials that deliver high-end looks for less. Here’s how we make it happen:
Affordable Material Options:
- Vinyl Sheets or Tiles: Durable, water-resistant, and available in designs that mimic expensive stone or wood.
- Peel-and-Stick Tiles: A DIY favorite for their ease of use and wide range of stylish options.
- Painted Floors: Transform old tiles with waterproof paint for a completely fresh look.
Cost-Saving Installation Techniques:
- Overlaying Existing Floors: Skip the demolition by installing new flooring over your current one.
- DIY-Friendly Solutions: Many materials like peel-and-stick tiles can be installed without professional help.
KEY BENEFITS FOR YOU
✅ Save Money: Affordable materials and minimal labor costs keep your project budget-friendly.
✅ Time-Efficient: Many methods, like peel-and-stick tiles, can be completed in a single weekend.
✅ Customizable Designs: Choose from a wide range of styles and finishes to match your vision.
✅ Durable Options: Budget-friendly doesn’t mean low-quality; these solutions are built to last.
✅ Eco-Friendly Choices: Many affordable materials, like recycled vinyl, are environmentally conscious.
STEP-BY-STEP PROCESS OF THE SERVICE
Step 1: Consultation and Planning
💡 What You Can Expect:
- We discuss your vision, budget, and timeline.
- Material recommendations tailored to your style and needs.
⏰ Timeline: 1–2 days for planning and sourcing materials.
Step 2: Floor Preparation
💡 What You Can Expect:
- Old flooring cleaned or lightly sanded for overlays.
- Any uneven surfaces leveled for a smooth finish.
⏰ Timeline: 1 day for preparation.
Step 3: Installation
💡 What You Can Expect:
- Peel-and-stick tiles or vinyl laid seamlessly.
- Edges sealed to prevent water damage.
⏰ Timeline: 1–2 days for installation.
Step 4: Final Touches
💡 What You Can Expect:
- Trim and edges refined for a polished look.
- Post-installation cleanup ensures a sparkling finish.
⏰ Timeline: Same day as installation completion.
DIY VS. PROFESSIONAL JOB
DIY Bathroom Floor Updates:
🛠 Pros:
- Lower costs for materials and labor.
- Full control over design and execution.
❌ Challenges:
- Requires time and effort.
- Mistakes can lead to uneven surfaces or water damage.
Professional Bathroom Floor Updates:
🏆 Pros:
- Expert craftsmanship ensures a flawless finish.
- Access to tools and techniques not typically available for DIY.
💲 Cost Comparison: Professionals may cost more upfront but save you time, stress, and potential costly mistakes down the line.
HELPFUL TIPS FOR YOU
✨ Maximize your bathroom floor update with these actionable tips!
- 💡 Choose Waterproof Materials: Opt for vinyl, peel-and-stick tiles, or waterproof paint to prevent moisture damage.
- 🛠 Test Before You Commit: Before installation, test small areas to ensure colors and textures align with your vision.
- 📐 Measure Twice, Cut Once: Accurate measurements save you time and prevent wasted materials.
- 🧹 Prep the Surface Thoroughly: Clean and smooth the existing floor for the best adhesion and finish.
- 🌟 Seal the Edges: Protect your new floor by sealing edges and seams to keep water from seeping through.
- 🎨 Experiment with Patterns: Create a designer look by arranging tiles in herringbone, diamond, or checkerboard patterns.
MAINTENANCE AND AFTERCARE
💧 Keep your updated floor looking fresh and new with these easy steps:
- 👟 Use Gentle Cleaners: Clean your floor regularly with mild, non-abrasive cleaners to avoid scratches.
- 🌬 Dry Spills Quickly: Wipe up water immediately to prevent damage, especially near seams and edges.
- 🚪 Add Rugs or Mats: Use waterproof mats near the shower and sink for extra protection.
- 🐾 Avoid Sharp Objects: Prevent scratches by using furniture pads on items placed on the floor.
- 🔍 Periodic Inspections: Check for lifting tiles or damage and repair promptly to maintain integrity.
FAQs
Q: What’s the most affordable material for bathroom floors?
A: Peel-and-stick tiles and vinyl sheets are among the cheapest, durable, and stylish options.Q: Can I install a new floor over my existing one?
A: Yes! Overlaying is a great way to save time and money by avoiding demolition.Q: How long does a budget bathroom floor update take?
A: Most DIY projects can be completed in 1–2 days, while professional installations might take 2–3 days.Q: Will peel-and-stick tiles hold up in a wet environment?
A: Yes, as long as they are properly sealed and installed on a smooth, clean surface.Q: Can I paint my bathroom tiles?
A: Absolutely! Use waterproof and mold-resistant paint for the best results.Q: What tools are required for a DIY installation?
A: Basic tools include a utility knife, measuring tape, and a roller for pressing down tiles.Q: Is it hard to maintain a vinyl floor?
A: Not at all! Regular cleaning and prompt spill management keep it in great shape.Q: How can I prevent my floor from becoming slippery?
A: Opt for non-slip flooring materials or add anti-slip rugs in high-traffic areas.Q: Do professionals charge extra for removing old flooring?
A: Typically, yes. Overlaying your new floor can save on this cost.
DID YOU KNOW?
✨ Quick Fun Facts About Budget Bathroom Floor Updates:
- Peel-and-stick tiles can mimic high-end marble or wood finishes for as little as $1 per square foot.
- Vinyl flooring is not only budget-friendly but also one of the most eco-friendly options due to its recyclability.
- Waterproof paint for tiles can transform an entire floor for less than $50.
🌟 Seasonal Tip: Winter is the perfect time for indoor projects like bathroom updates. You’ll avoid peak contractor rates during the warmer months!
WHAT OUR CLIENTS SAY
💬 “Updating our bathroom floor was so easy and affordable! The peel-and-stick tiles transformed the space, and it only took us a weekend.”
– Sarah, Happy Homeowner
💬 “We hired professionals to install vinyl over our old tile, and the results were flawless. They worked quickly and saved us so much time!”
– John, Satisfied Client
GET IN TOUCH
🚿 Ready to upgrade your bathroom floor without breaking the bank?
Contact us today to explore affordable options that suit your style and budget.
📧 Email us: co*****@***********************se.com
💻 Visit us online: bathroomremodelingluxrise.com
🌟 Request your free estimate now and start your transformation today!